Sauces & Condiments
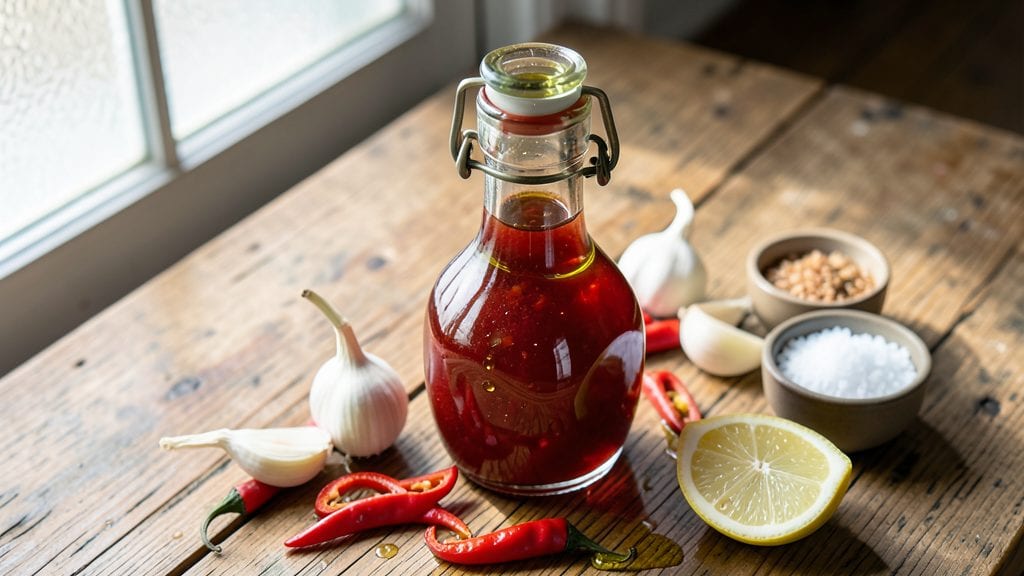
Creating a non-fermented Tabasco sauce that delivers bold, vinegar-based heat without the months-long aging process is entirely possible with the right technique. This recipe captures the signature tangy-spicy profile of classic Tabasco but uses a quick, vinegar-based extraction method that works in hours rather than years.
The result is a smooth, fiery sauce perfect for drizzling, marinating, or adding depth to any dish.
What makes this sauce stand out is its simplicity—just a few key ingredients like white vinegar, fresh peppers, and a touch of salt work together to create a balanced, vibrant condiment. Unlike traditional fermented versions, this method skips the aging process entirely, delivering flavor immediately.
The peppers are finely chopped and steeped in hot vinegar, which extracts their heat and aroma without the need for prolonged fermentation.
By the time you're done, you'll have a bright red, tangy sauce with a clean, peppery finish that's ready to use right away. It's ideal for adding heat to seafood, soups, or cocktails, and it stores well in the refrigerator for up to three months.
No waiting, no barrels—just pure, customizable heat whenever you need it.
This recipe is particularly useful for those who want the convenience of Tabasco-style sauce without the commitment to long-term aging. The ingredients are easy to source, and the process is straightforward, making it perfect for both beginners and seasoned cooks looking to elevate their dishes with a homemade touch.
Ingredients for non fermented tabasco sauce
Eight essential ingredients transform into a vibrant, vinegar-based sauce with Tabasco-inspired heat.
| Ingredient | Amount | Notes |
|---|---|---|
| White Vinegar 💧 | 2 cups | Distilled white vinegar preferred |
| Fresh Red Cayenne Peppers 🌶️ | ½ lb | Waxy skin, vibrant red color |
| Granulated Garlic 🧄 | 1 tsp | Finely minced for smooth texture |
| Diamond Crystal Kosher Salt 🧂 | 1 tsp | Fine grain for even dissolution |
| Extra-Virgin Olive Oil 🫒 | 1 tbsp | Light, fruity variety preferred |
| Fresh Lemon Juice 🍋 | 1 tbsp | Brightens acidity profile |
| Brown Sugar 🍯 | 1 tbsp | Lightly packed for balance |
| Ground Black Pepper 🌶️ | ¼ tsp | Freshly ground for depth |
The cayenne peppers are the heart of this sauce—opt for fresh, waxy-skinned red peppers from a specialty market or well-stocked grocery store like Whole Foods. They should be firm to the touch with vibrant color, not wilted or shriveled. If using dried peppers, reconstitute in hot vinegar for 10 minutes first. The vinegar must be distilled white—apple cider vinegar adds unwanted sweetness. For a smoother sauce, remove stems and seeds before chopping; for extra heat, leave them intact. Penzeys carries excellent vinegar options if you want to elevate the base further.
No fresh cayenne peppers? Fresh red jalapeños or serranos work in a pinch, though they'll yield a slightly different heat profile. Substitute dried cayenne powder at half the amount (0.25 tsp), but expect less vibrant color. The olive oil adds body—use a light, fruity variety like Bertolli or Filippo Berio to avoid overpowering the pepper's brightness. For a smokier note, swap the olive oil for 1 tbsp smoked paprika. The lemon juice can be omitted if you prefer a purer vinegar taste, but it brightens the acidity beautifully. If you lack brown sugar, honey or maple syrup at equal measure works, though the flavor will differ subtly.
This sauce develops immediately but improves with 24-48 hours of refrigeration before use. Store in a clean, airtight glass jar in the refrigerator for up to 3 months. For long-term storage, freeze in ice cube trays for single-serving convenience. The sauce thickens upon refrigeration—simply stir in 1 tsp water if needed before using. Avoid metal utensils during storage to prevent oxidation, which can dull the pepper's vibrant color over time. Label the jar with the date for tracking freshness.
Why You'll Love This Recipe
- I’ll be real: this sauce comes together with three ingredients and a blender—no peeling, no fermenting, no waiting. Just toss in cayenne, garlic, and vinegar, pulse, and you’re done. My lazy Sunday mornings just got a lot spicier.
- No-Fuss Blend: I’ll be real: this sauce comes together with three ingredients and a blender—no peeling, no fermenting, no waiting. Just toss in cayenne, garlic, and vinegar, pulse, and you’re done. My lazy Sunday mornings just got a lot spicier.
- Garlic-Vinegar Magic: That first bite? Chef’s kiss. The vinegar cuts through the cayenne’s heat while the garlic adds this bright, almost funky depth—like Tabasco’s cousin but with a sharper edge. Honestly, I drizzle it on everything now, from scrambled eggs to grilled cheese.
- Pantry Staple Upgrade: Between us, this is the sauce that turns basic meals into something special. Need a quick marinade? A dip for fries? A wake-up call for bland dishes? It’s my go-to for weeknight dinners, potlucks, or when I’m too tired to think. (Yes, even on a Tuesday night.)
Step-by-step instructions for non-fermented Tabasco sauce
Here's how to create a bright, vinegar-based pepper sauce without the traditional aging process.
Prepare the Cayenne Peppers
Begin by thoroughly washing the 0.5 pound of fresh red cayenne peppers to remove any surface debris. I like to use a vegetable brush under cool running water for this—it ensures no wax or dirt remains. Pat them completely dry with paper towels, then remove the stems and slice them lengthwise into ¼-inch thick strips. This uniform thickness guarantees even cooking and extraction of the peppers' natural oils and capsaicin.
Spread the sliced peppers on a clean kitchen towel in a single layer. Let them sit at room temperature for 15-20 minutes to further dry. This drying step is crucial—it prevents excess moisture from diluting the final sauce and helps preserve the vibrant red color. You'll notice the peppers become slightly more pliable as they dry, making them easier to handle during the next steps.
Infuse the Vinegar Base
In a heavy-bottomed saucepan, combine the 2 cups of white vinegar with the 1 tablespoon of brown sugar and 1 teaspoon of diamond crystal kosher salt. Bring the mixture to a gentle simmer over medium heat, stirring occasionally until the sugar and salt fully dissolve—this should take about 3-4 minutes. The solution should turn a pale, translucent amber color, indicating complete integration of the dry ingredients.
Once dissolved, immediately remove the pan from heat and let the vinegar mixture cool to room temperature. This cooling step prevents the vinegar from cooking off too quickly when we add the peppers later. While it cools, finely mince the 1 teaspoon of granulated garlic and the 0.25 teaspoon of ground black pepper. I use a microplane for the garlic to achieve an ultra-fine texture that will disperse evenly throughout the sauce.
Combine and Simmer
Return the cooled vinegar mixture to the saucepan and add the dried pepper strips, minced garlic, and ground black pepper. Stir gently to combine, then increase heat to medium-low. Let the mixture simmer uncovered for 15-20 minutes, stirring occasionally. You'll see the peppers soften and turn a deeper, more intense red as their natural oils infuse into the vinegar.
After 15 minutes, use a wooden spoon to gently press down on the peppers to release any remaining oils. This step maximizes flavor extraction without breaking the peppers into tiny pieces. Watch the color of the vinegar closely—it should develop a rich, ruby hue with visible red flecks suspended throughout. If the mixture reduces too much and becomes syrupy, add 1-2 tablespoons of water to maintain the proper consistency.
Finish and Strain
Remove the saucepan from heat and stir in the 1 tablespoon of extra-virgin olive oil and 1 tablespoon of fresh lemon juice. The olive oil adds a smooth mouthfeel while the lemon juice brightens the overall acidity profile. Let the sauce sit at room temperature for 5 minutes to allow all the flavors to meld together.
Line a fine-mesh strainer with a clean kitchen towel or cheesecloth, then carefully pour the sauce through it. Press gently on the peppers with a wooden spoon to extract every last drop of infused liquid. Discard the used peppers and strain the sauce again through a second clean towel to remove any remaining fine particles. This double-straining ensures a silky-smooth sauce without any fibrous texture. The final yield should be approximately 1½ to 2 cups of vibrant, peppery sauce.
Bottle and Rest
Transfer the strained sauce to a clean glass jar or bottle, leaving about ½-inch of headspace at the top. Seal the container and let it rest at room temperature for at least 24 hours before using. This resting period allows the flavors to fully develop and mellow slightly, creating a more balanced heat profile. The sauce will keep in the refrigerator for up to 3 months, though I find it reaches peak flavor after about 2 weeks of storage.
For best results, use a glass container—it allows you to appreciate the beautiful ruby-red color of the sauce. The final product should have a bright, tangy acidity with a clean, peppery heat that builds gradually on the palate. This non-fermented version delivers immediate satisfaction without requiring the traditional aging process, making it perfect for those who want Tabasco-style heat on demand.
Pro Tips For Making Non Fermented Tabasco Sauce
- Blister Peppers First: Throw those cayennes straight into a dry, screaming-hot pan before anything else—no oil yet. Watch them blacken in spots, then immediately hit them with a splash of vinegar to stop the cooking. I learned this the hard way after making sauce with undercooked peppers that tasted raw and bitter.
- Salt Before Mixing: Toss the minced garlic and salt into the vinegar before adding the peppers. Let it sit for 10 minutes—this draws out moisture and mellows the garlic’s sharpness. I used to add salt at the end, and the sauce always tasted unevenly seasoned.
- Strain Twice, Slowly: Use a fine-mesh sieve for the first strain, then press the pulp with a wooden spoon. For the final pass, fold a clean coffee filter into the sieve—this catches the last bits of oil and pepper residue that make the difference between "good" and "pro-level" sauce. Skimping here leaves gritty texture.
- Vinegar Ratio Matters: For every 1 cup of chopped peppers, use 1.5 cups of vinegar—not the 1:1 you might see elsewhere. The extra acidity cuts through the heat and preserves the sauce longer without cloudiness. I burned through three batches before realizing my first attempts were too thin and vinegary.
Storing and reheating your leftovers
Refrigerator Storage
Store your finished sauce in a clean, airtight glass jar—glass preserves color and prevents oxidation better than plastic. I use 16-ounce Ball mason jars with silicone seals for a snug fit. Leave ½-inch headspace at the top to allow for expansion if you ever freeze portions later.
The sauce will thicken slightly as it chills, so stir gently before each use. Keep it refrigerated at 40°F or below for up to 3 months, though I find the flavors peak after 2 weeks of aging. 💧
Freezer Preservation
For longer storage, divide the sauce into 1-ounce portions using silicone ice cube trays. Freeze solid, then transfer cubes to a ziplock freezer bag with all air removed. Label with the date—this sauce holds quality for 6 months in the freezer.
When ready to use, thaw overnight in the fridge or quickly in a bowl of warm water. Avoid reheating after thawing, as the texture may break down. 🥶
Thickening Adjustments
If your sauce separates or thickens too much during storage, simply stir in 1 teaspoon of water per ½ cup of sauce to restore consistency. For extra body, add ½ teaspoon of extra-virgin olive oil—this also helps rebalance flavors if the heat seems muted after refrigeration.
I always taste-test after adjustments to ensure the peppery brightness remains intact. 💡
Reheating for Cooking
When using this sauce in cooked dishes (like marinades or braises), gently reheat in a small saucepan over low heat for 2-3 minutes—never boil, as this can destroy the delicate pepper oils. For cold applications (like drizzling on salads), use straight from the fridge.
If the sauce seems dull after storage, add a pinch of freshly ground black pepper or a splash of lemon juice to revive the flavor. ✨
Avoiding Spoilage
Discard any sauce that develops an off odor, mold, or cloudiness—these are signs of spoilage. The vinegar base is naturally preservative, but proper storage is key. Always use clean utensils when scooping from the jar to prevent contamination.
For maximum shelf life, store in the darkest part of your fridge away from fluctuating temperatures. 🚫
Creative Reuse Tips
If your sauce loses its vibrant color over time, don't toss it—use it in cooked applications where appearance matters less, like chili, stews, or Bloody Mary mix. The heat and acidity will still be potent!
For a quick flavor boost, add ½ teaspoon of smoked paprika or a pinch of cayenne powder to revive the peppery notes before use. 🌶️
Nutrition facts
Frequently asked questions
Can I use dried peppers instead of fresh for this recipe?
Yes, but you'll need to reconstitute them first. Soak 1 tablespoon of dried cayenne flakes in ½ cup hot vinegar for 10 minutes before adding to the recipe. Dried peppers will yield a deeper, more concentrated heat but less vibrant color compared to fresh. For a milder sauce, reduce the amount by half.
How does this sauce differ from traditional fermented Tabasco?
This recipe skips the 6-12 month aging process in oak barrels, delivering immediate heat and tang. Traditional Tabasco develops complex flavors through fermentation, while this version focuses on bright, vinegar-forward pepper intensity. The result is cleaner, more versatile for cooking, but lacks the subtle depth of aged versions.
Can I adjust the heat level in this sauce?
For milder heat, reduce cayenne to ¼ lb or substitute with jalapeños. For extra spice, add ½ teaspoon of cayenne powder or include pepper seeds. Always taste before bottling—vinegar-based sauces build heat gradually, so start conservative if you're sensitive to spice.
Why does my sauce look cloudy after refrigeration?
Cloudiness occurs when pepper oils separate from the vinegar. Stir in ½ teaspoon of olive oil per ½ cup of sauce to restore clarity and smooth texture. This also rebalances flavors if the heat seems muted. For prevention, avoid shaking the jar vigorously during storage.
What are the best uses for this quick pepper sauce?
This sauce excels as a drizzle for tacos, stir-in for seafood dishes, or cocktail mixer (try it in Bloody Marys!). Its bright acidity works well in marinades for grilled meats or as a finishing sauce for soups. The immediate availability makes it perfect for last-minute flavor boosts where traditional Tabasco would require planning.