Sauces & Condiments
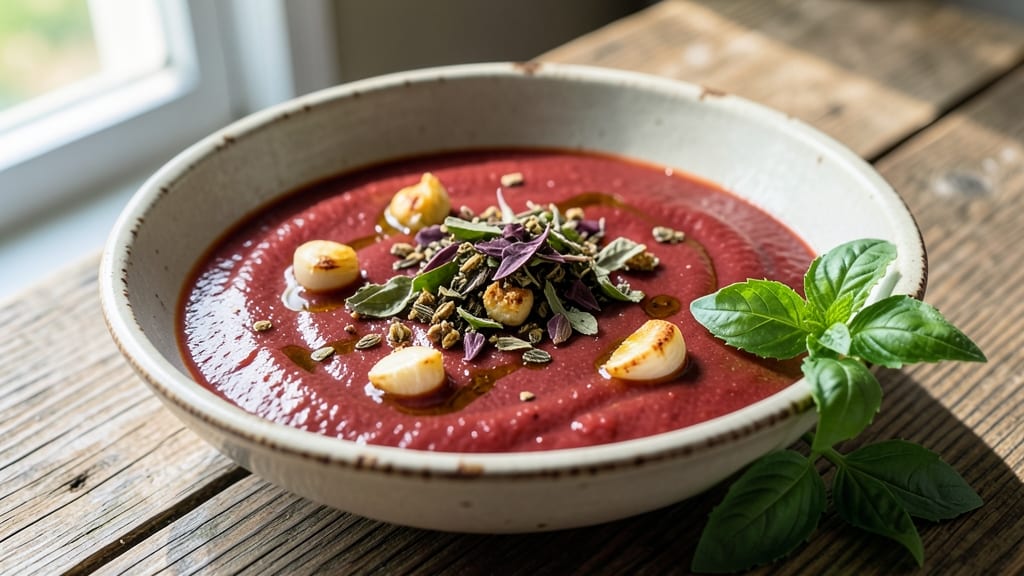
This Nonna's sauce recipe transforms simple pantry staples into the rich, velvety tomato base that defines Italian home cooking. The secret lies in slow simmering—letting flavors meld over time rather than rushing through the process.
My grandmother used to say, "Good sauce needs patience," and she wasn't wrong. This isn't just a sauce; it's a flavor foundation that elevates everything it touches, from pasta to grilled meats.
The beauty of this recipe is its simplicity—just a few core ingredients that build depth through technique. We're talking crushed tomatoes, garlic, olive oil, and fresh herbs, all simmered together until the flavors become one harmonious blend.
The key is letting it cook low and slow, allowing the natural sweetness of the tomatoes to caramelize and the herbs to release their full aroma. This isn't about shortcuts; it's about creating something that tastes like it's been simmering all day, even if it only takes an hour.
What you'll end up with is a sauce that's rich enough to coat pasta perfectly, yet bright enough to stand up to bold flavors. It develops a natural sweetness from the tomatoes and a depth from the garlic and herbs that makes every bite taste like home.
The best part? This sauce keeps improving as it sits, so it only gets better with time. Store it in the fridge for up to a week or freeze it for months—it's that versatile.
Perfect for weeknight dinners, Sunday family meals, or even as a gift in jars. The possibilities are endless, from tossing it with spaghetti to using it as a marinade for grilled chicken.
This is the kind of sauce that makes you want to cook more, not less. Let's get started on creating something that tastes like love in every spoonful.
Ingredients for nonna's sauce
Pantry staples that turn into the heart of Italian meals—simple but powerful.
| Ingredient | Amount | Notes |
|---|---|---|
| Extra-Virgin Olive Oil 🫒 | ½ cup | High-quality, fruity variety |
| Garlic Cloves 🧄 | 6 cloves | Freshly minced, not pre-minced |
| Crushed Tomatoes 🍅 | 28 oz | San Marzano preferred |
| Dried Basil 🌿 | 1 tbsp | Or 0.25 cup fresh basil |
| Dried Oregano 🌿 | 1 tsp | Italian oregano preferred |
| Salt 🧂 | 1 tsp | Kosher or sea salt |
| Black Pepper 🌶️ | ½ tsp | Freshly ground preferred |
| Red Wine 🍷 | ½ cup | Dry, medium-bodied red |
| Sugar 🍬 | 1 tbsp | Balances acidity |
The tomatoes are everything here. San Marzano cans are the gold standard—they're sweeter and less watery than regular crushed tomatoes. If you can't find them, any good-quality crushed tomatoes will work, but avoid the ones with added salt or preservatives. The garlic should be fresh, not that pre-minced jar stuff—it's worth taking 30 seconds to peel and mince it yourself. For the olive oil, any extra-virgin will do, but avoid the cheap stuff that tastes like soap. I usually grab mine from Trader Joe's or Whole Foods—they've got good options that won't break the bank.
No red wine? Substitute with extra tomato paste or beef broth—just add a splash of vinegar for acidity. Fresh basil is ideal, but if you're using dried, cut it in half since dried herbs are more concentrated. The sugar might seem odd, but it helps balance the acidity of the tomatoes and wine—don't skip it, even if you think your tomatoes are sweet enough. The oregano is non-negotiable; Italian oregano has a slightly different flavor than Mexican oregano, so if you can find it, grab that. And if you're feeling fancy, add a pinch of red pepper flakes for a little kick.
This sauce gets better with time—3-4 days in the fridge is ideal, but it'll keep for up to 2 weeks if you store it properly. I like to portion it into jars so I can grab one for a quick weeknight dinner. Freezes beautifully too—just leave some room at the top since it expands when frozen. If you make a big batch, label the jars with the date so you don't forget. And trust me, it reheats even better than it tastes fresh.
Why You'll Love This Recipe
- Fewer Ingredients, Bigger Payoff: I swear by this—just oil, garlic, tomatoes, and herbs. No fancy pantry tricks, no last-minute grocery runs. The crushed tomatoes? They’re the star, breaking down into that silky, sweet-savory base with almost no work. Honestly, I’ve made it while scrolling through emails.
- Herbs That Sing: That first whiff of basil and oregano simmering in olive oil? It’s like a hug in sauce form. The garlic doesn’t overpower—it just lingers, warm and mellow, while the tomatoes deepen into something rich. Between us, I’ve had “fancy” sauces that cost twice as much but tasted half as good.
- Weeknight to Weekend: Slap this on pasta for Tuesday, toss it with grilled chicken for a potluck, or even drizzle it over pizza crusts when you’re feeling lazy. The sauce thickens beautifully—no thinning required—and the flavors only get better the next day. (Yes, even on a Tuesday night.)
- Leftovers That Lie: I make a double batch every time because the leftovers? They’re the real MVP. Stash them in the fridge for up to five days, and they’ll still taste like you spent hours stirring. Budget-friendly? Absolutely. The ingredients won’t break the bank, and you’ll have enough to feed the family without stressing over seconds.
Step-by-step instructions for Nonna's sauce recipe
Here's how to transform simple pantry staples into Nonna's legendary tomato sauce.
Sauté the Garlic in Olive Oil
Heat the 0.5 cup extra-virgin olive oil in a large, heavy-bottomed saucepan over medium heat. Once the oil shimmers but doesn't smoke, add the 6 cloves freshly minced garlic cloves. Let them cook for 1-2 minutes until they're fragrant and just beginning to turn golden—this prevents them from burning, which would make the sauce bitter.
I like to stir them gently with a wooden spoon, making sure each clove gets nicely coated in the oil. You'll know they're ready when the kitchen smells like garlic heaven and the edges start to turn a pale golden color. This step is the flavor foundation, so don't rush it.
Add Tomatoes and Herbs
Pour in the 28 oz crushed tomatoes and stir well to combine with the garlic. Add the 1 tbsp dried basil, 1 tsp dried oregano, 1 tsp salt, and 0.5 tsp black pepper. Give everything a good stir to distribute the seasonings evenly throughout the tomatoes.
Bring the mixture to a gentle simmer over medium-low heat. The sauce should bubble softly but not vigorously. Let it cook uncovered for 15-20 minutes, stirring occasionally. You're looking for the sauce to reduce slightly and develop a thicker consistency. This is where the flavors start to meld together beautifully.
Incorporate the Wine and Sugar
After the initial simmer, pour in the 0.5 cup red wine and the 1 tbsp sugar. The wine will help deglaze the pan and add depth to the sauce, while the sugar balances the acidity of the tomatoes. Stir well to combine everything completely.
Let the sauce simmer again for another 10-15 minutes, stirring occasionally. You'll notice the sauce thickening further and the alcohol from the wine evaporating. This is the moment when the sauce really starts to come together. Taste it now—it should be developing that rich, complex tomato flavor with just a hint of sweetness.
Simmer Until Thick and Flavorful
Continue simmering the sauce uncovered for 30-45 minutes total, stirring occasionally. The sauce should reduce until it's thick enough to coat the back of a spoon. You want it to be velvety smooth with a beautiful, glossy sheen.
If the sauce starts to stick to the bottom of the pan, add a splash of water or a little more red wine to loosen it. The key here is patience—let it simmer gently so it doesn't burn. When it's done, the sauce should have a deep, rich color and a concentrated tomato flavor with all the herbs perfectly integrated. This is Nonna's secret: slow, gentle cooking brings out the best in simple ingredients.
Adjust Seasoning and Serve
Once the sauce has reached your desired consistency, remove it from the heat. Taste it and adjust the seasoning if needed. You might need a little more salt or pepper to balance the flavors. Let the sauce cool slightly—it will thicken even more as it cools.
This sauce is incredibly versatile. Serve it immediately over pasta, use it as a pizza sauce, or store it in the refrigerator for up to 5 days or freeze it for up to 3 months. The flavors only get better with time as they continue to meld together. Enjoy your homemade Nonna's sauce—it's worth every minute of simmering time!
Pro Tips For Making Nonna'S Sauce
- Sweat the Garlic Low: I learned this the hard way—crispy garlic burns fast and turns bitter. Once the olive oil shimmers, drop in the cloves and reduce heat to medium-low. Stir constantly for 3-4 minutes until golden but not browned. That nutty aroma? That’s the flavor you’re after.
- Crush Tomatoes by Hand: Canned crushed tomatoes work, but fresh or high-quality canned tomatoes taste better when you give them a quick rough crush with your fingers. Break up any big chunks and press them through a sieve if you’re picky—this removes skins and seeds, giving you a smoother, brighter sauce. (Yes, even if you’re impatient like me.)
- Salt the Oil First: Toss a pinch of salt into the olive oil before adding garlic—it keeps the cloves from sticking to the pan and adds a subtle depth to the whole sauce. Skip this, and you’ll end up scraping burnt garlic off the bottom later. (Your future self will thank you.)
- Simmer Uncovered, Stir Often: After adding tomatoes and herbs, let the sauce bubble uncovered for the first 10 minutes. This helps the alcohol (if any) and excess water evaporate faster, concentrating the flavor. Stir every 2-3 minutes to prevent sticking—this isn’t the time to walk away.
Common mistakes when making your nonna's sauce
Rushing the Cooking
I’ve seen so many cooks crank the heat up high to speed things along, but that’s a big mistake with Nonna’s sauce. High heat burns the garlic and concentrates the acidity in the tomatoes, leaving you with a bitter, sharp sauce instead of the sweet, balanced flavor you want.
The key is low and slow—think medium-low heat the entire time. This lets the flavors develop naturally without turning harsh. 🌡️
Skipping the Sugar
That 1 tbsp sugar isn’t just for sweetness—it balances the acidity in the tomatoes and wine, preventing the sauce from tasting overly tangy. I’ve had students ask if they can skip it, especially if they’re using very sweet tomatoes.
But trust me, even if your tomatoes taste sweet, the acidity will still need balancing. A little sugar goes a long way in mellowing out the sharpness. 🍬
Using Pre-Minced Garlic
Pre-minced garlic from a jar is a flavor killer because it’s often preserved with water or oil that dulls its punch. Freshly minced garlic releases its aromatic oils when cooked, giving your sauce that deep, savory foundation.
Take the extra 30 seconds to peel and mince your own—it makes all the difference. I still remember Mrs. Henderson scolding me for using jarred garlic when I was learning to cook. 🧄
Ignoring the Deglaze
The red wine isn’t just for flavor—it’s for deglazing the pan after the garlic cooks. Those browned bits on the bottom (fond) are packed with flavor, and the wine helps lift them into the sauce.
If you skip this step, you’re missing out on layers of depth. Pour in that ½ cup wine and let it simmer for a few minutes to fully incorporate those caramelized bits. 🍷
Over-Stirring or Under-Stirring
Stirring too much can break down the tomatoes and make the sauce watery, while not stirring enough lets it stick and burn. The goal is gentle, occasional stirring—every 5-10 minutes—to keep everything moving without overworking the sauce.
I like to give it a quick stir and then let it do its thing. Patience is key here. 🔥
Not Tasting as You Go
Many home cooks wait until the very end to taste their sauce, but that’s too late. Check the seasoning at least once during the simmering process. The flavors evolve, and you might need to adjust the salt or acidity along the way.
I always taste mine after the wine is added and again before serving. This is how you catch mistakes early—like if the sauce needs more salt or a splash of vinegar to brighten it up. 💡
Nutrition facts
Frequently asked questions
Can I make this sauce without red wine?
Replace the ½ cup red wine with either ½ cup tomato paste or ½ cup beef broth. If using broth, add 1 teaspoon red wine vinegar to maintain acidity. The sauce will still develop rich flavors—it just won't have the wine's depth.
How do I know when the sauce is done?
The sauce is ready when it coats the back of a spoon smoothly and has reduced by about 30-40%. It should smell deeply aromatic with no raw tomato taste. Taste it—it should be sweet, savory, and balanced, not sharp or watery. For extra assurance, check the consistency after cooling slightly (it thickens more as it rests).
Can I add meat to this sauce?
Yes! For a meaty version, brown 1 pound ground beef or Italian sausage first, then strain out excess fat before adding the tomatoes. Cook the meat separately and mix it in during the final 10 minutes of simmering. Never cook meat directly in the sauce—this makes it greasy. For a lighter option, try ½ cup finely chopped pancetta instead.
Why does my sauce taste bitter?
Bitterness usually comes from burning garlic or overcooking tomatoes. Always cook garlic over medium heat until just golden, then remove it immediately. If your sauce is too acidic, add ½ teaspoon sugar or a pinch of baking soda (just a tiny amount!) to neutralize. Never let the sauce boil vigorously—keep it at a gentle simmer.
How should I store leftover sauce?
Let the sauce cool completely, then transfer to an airtight container. It keeps in the fridge for 5-7 days and freezes beautifully for up to 3 months. For freezing, leave 1-inch headspace (sauce expands). Portion into jars for easy use—just thaw overnight in the fridge. The flavors actually improve after 2-3 days of refrigeration!