Sauces & Condiments
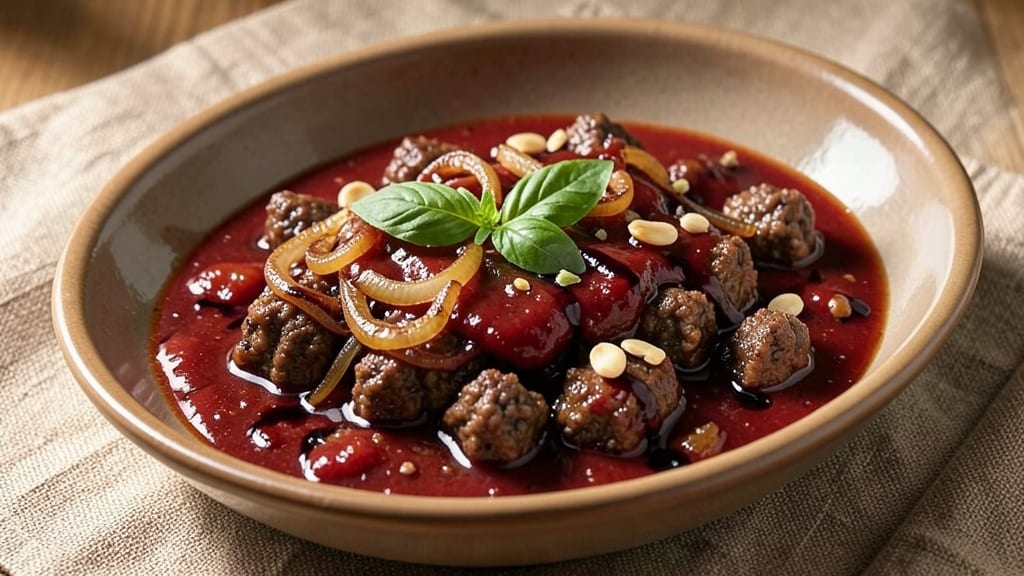
Bobby Flay's meat sauce recipe transforms simple ingredients into a restaurant-quality masterpiece that clings to pasta like a second skin. This isn't just any sauce—it's a slow-simmered symphony of umami richness, where ground beef develops deep, caramelized flavors while wine and herbs infuse every layer.
I've recreated Flay's signature technique, which relies on patience and precision to build complexity without shortcuts.
The secret lies in the three-stage cooking process: browning the meat for maximum flavor, deglazing with wine to dissolve those precious browned bits, and then simmering for at least 45 minutes to let the sauce develop its signature depth.
Fresh herbs like basil and oregano finish the sauce just before serving, ensuring vibrant flavor without overpowering the dish. This isn't a quick weeknight sauce—it's a labor of love that delivers perfect results every time.
What you'll end up with is a sauce so rich and velvety it transforms even the simplest pasta into an elegant meal. The texture is thick enough to coat each noodle perfectly, while the flavor balances sweetness from tomatoes, acidity from wine, and savory depth from the meat.
The aroma alone will have everyone gathering around the table, and the first bite will confirm why this is Flay's go-to for pasta nights.
Serve this sauce over your favorite pasta—spaghetti, fettuccine, or even pappardelle—and pair it with a simple green salad to cut through the richness. The leftovers? Even better the next day as the flavors meld further.
Let's get cooking—this is the meat sauce that will make you the star of dinner parties.
Ingredients for bobby flay meat sauce
Restaurant-quality flavors start with these simple yet transformative ingredients—everything you need for Flay's legendary umami-rich meat sauce.
| Ingredient | Amount | Notes |
|---|---|---|
| Ground Beef (Chuck or 80/20 Blend) 🥩 | 1 ½ lb | 80/20 fat ratio preferred |
| Extra-Virgin Olive Oil 🫒 | 2 tbsp | High-quality, fruity variety |
| Yellow Onion 🧅 | 1 whole | Medium size, finely diced |
| Garlic Cloves 🧄 | 4 cloves | Peeled, finely minced |
| Dry Red Wine 🍷 | 1 cup | Bold Cabernet Sauvignon or Merlot |
| Canned San Marzano Tomatoes 🍅 | 28 oz | Crushed or whole, no salt added |
| Tomato Paste 🍅 | 2 tbsp | High-quality, no sugar added |
| Fresh Basil Leaves 🌿 | ¼ cup | Packed, finely chopped |
| Fresh Oregano Leaves 🍃 | ¼ cup | Packed, finely chopped |
| Diamond Crystal Kosher Salt 🧂 | 1 tsp | Fine grain preferred |
| Freshly Ground Black Pepper 🌶️ | ½ tsp | Cracked peppercorns preferred |
| Unsalted Butter 🧈 | 2 tbsp | Cold, cut into small pieces |
| Freshly Grated Parmesan Cheese 🧀 | ½ cup | Parmigiano-Reggiano preferred |
| Pasta (Spaghetti or Fettuccine) 🍝 | 12 oz | Dry weight, cooked al dente |
The beef is non-negotiable here—80/20 chuck blend delivers the perfect fat-to-meat ratio for deep flavor and rich texture. Costco's pre-ground chuck is my go-to for consistency, but any quality butcher will have it. Look for bright red color and visible fat marbling. The San Marzano tomatoes are worth the splurge—they're sweeter and more flavorful than standard canned tomatoes. If you can't find them, Mueller or Cento brands are solid alternatives. Fresh herbs are critical too—farmers market basil and oregano have far more vibrancy than store-bought, but use what you can get as long as the leaves are bright and free of bruises.
No red wine? Dry white wine or beef broth works in a pinch, though the flavor will be subtly different. The tomato paste can be the squeeze-tube kind from Trader Joe's if you're short on time—just measure carefully. For the herbs, dried oregano at one-third the amount works if fresh isn't available, but fresh basil is irreplaceable. The butter at the end? Use European-style butter like Plugrá if you want extra richness. And trust me on the Parmigiano-Reggiano—pre-grated tastes like sawdust compared to freshly grated from a wedge. If you're making this ahead, skip the fresh herbs until serving to keep their color and flavor bright.
This sauce tastes even better the next day as the flavors meld—portion into airtight containers with a thin layer of olive oil on top to preserve freshness. Keeps for 5 days in the fridge or 3 months frozen. For freezing, cool completely first and use freezer-safe containers. The pasta? Cook it al dente and toss with a little pasta water and olive oil before adding the sauce—prevents a gummy mess. Leftovers reheat beautifully—just warm gently on the stove with a splash of water or wine to restore richness.
Why You'll Love This Recipe
- No-Wine-Snobbery Needed: I swear by that $8 bottle of red—no fancy labels required. The wine deglazes the pan while you chop, turning into a rich, velvety base that tastes like you spent hours simmering. (Between us, I’ve used Cabernet Sauvignon and Chianti—both work, but the latter’s fruitiness shines.)
- One-Pan Magic: Olive oil hits the pan first, then the beef browns in minutes—no flipping, no fuss. The onions caramelize right alongside, and by the time the garlic sizzles, the kitchen smells like a restaurant. Honestly, I’ve made this while scrolling through emails. It’s that unfussy.
- Pasta’s Best Friend: Slap it on spaghetti for dinner, toss it into a pan with polenta for brunch, or stuff it into manicotti for a crowd. My kids ask for it over pizza, and my husband saves it for sandwiches the next day. (Yes, even on a Tuesday night.)
- Budget Luxury: Chuck roast is cheaper than sirloin, and a bottle of wine stretches further than you’d think. The sauce thickens beautifully, so leftovers reheat like a dream—no splattering, no drying out. I’ve fed six people for under $20 with this, and no one complains.
Step-by-step instructions for Bobby Flay's meat sauce recipe
Here's how to craft a rich, slow-simmered meat sauce that rivals Bobby Flay's signature depth and umami.
Build the Flavor Foundation with Onions and Garlic
Heat the 2 tablespoons extra-virgin olive oil in a large, heavy-bottomed pot over medium-low heat. Add the finely diced yellow onion and cook for 10-12 minutes, stirring occasionally, until the onions turn a deep golden brown and their edges begin to caramelize. This slow cooking develops sweetness that forms the sauce's base.
Push the onions to one side of the pot and add the 4 minced garlic cloves to the empty space. Cook for 30 seconds until fragrant but not browned—burnt garlic will make the sauce bitter. Stir to combine with the onions, then add the 2 tablespoons tomato paste. Cook for another 2 minutes, stirring constantly, until the paste darkens slightly and releases its concentrated flavor. This step creates the sauce's velvety texture and deep color.
Brown the Ground Beef for Maximum Flavor
Increase heat to medium-high and add the 1.5 pounds ground beef (chuck or 80/20 blend). Using a wooden spoon, break the beef into small pieces and let it brown for 5-6 minutes without stirring constantly—this allows a crust to form on each piece. Once the beef is deep brown with no pink remaining, drain excess fat, leaving about 2 tablespoons in the pot to help build flavor.
Real talk: Don't rush this step. The browned bits (fond) dissolve into the sauce, creating layers of complexity that separate this from basic meat sauce. If your pot gets too full of fat, carefully remove excess with a paper towel-lined spoon—you want flavor, not grease.
Deglaze with Wine and Incorporate Tomatoes
Pour in the 1 cup dry red wine, scraping up any browned bits from the bottom of the pot with a wooden spoon. Let the wine simmer for 3-4 minutes until reduced by half, allowing the alcohol to cook off and intensify the wine's flavors. This deglazing step is where the sauce starts to develop its signature depth.
Add the 28 ounces canned San Marzano tomatoes (crushed or whole) and bring to a gentle simmer. Stir in the 1 teaspoon Diamond Crystal kosher salt and ½ teaspoon freshly ground black pepper. Let the sauce cook uncovered for 20 minutes, stirring occasionally, until it thickens slightly and the raw tomato flavor mellows into a balanced umami profile.
Finish with Herbs and Butter for Richness
Reduce heat to low and stir in the ¼ cup chopped fresh basil leaves and ¼ cup chopped fresh oregano leaves. Add the 2 tablespoons cold unsalted butter, cut into small pieces, and let it melt into the sauce. The butter adds a luxurious mouthfeel and helps balance the acidity of the tomatoes. Taste and adjust seasoning—you may need a pinch more salt to enhance all the flavors.
Let the sauce simmer gently for another 10 minutes, stirring occasionally. The butter should be fully incorporated, and the sauce should coat the back of a spoon. This resting period allows the flavors to meld completely. Here's the thing—don't rush this final simmer. Patience at this stage makes all the difference between good sauce and restaurant-quality sauce.
Serve Over Perfectly Cooked Pasta
Cook the 12 ounces pasta (spaghetti or fettuccine) in salted boiling water until 1 minute shy of package directions for al dente. Reserve ½ cup pasta water before draining. Toss the drained pasta with the meat sauce, adding reserved pasta water 1 tablespoon at a time until the sauce coats the pasta beautifully. Finish with ½ cup freshly grated Parmesan cheese and serve immediately.
The sauce should cling to each strand of pasta with a glossy sheen, offering layers of beefy richness, herbal brightness, and a touch of wine's complexity. Each bite should deliver that perfect balance of umami, acidity, and fat—just like Bobby Flay's version. Serve with crusty bread to soak up any remaining sauce, because you won't want to waste a drop of this perfect meat sauce.
Pro Tips For Making Bobby Flay Meat Sauce
- BROWN THE BEEF RIGHT: Start with a screaming-hot pan—no half-measures—and let the chuck blend sizzle until it loses its raw color. I learned this the hard way: rushing this step means your sauce will taste like ground beef, not rich, caramelized flavor. Push the meat around with a wooden spoon and resist the urge to break it up until it’s deeply browned.
- SWEAT THE ONIONS LOW: After browning the beef, drop the heat to medium-low and let the onions cook until they’re translucent but not golden—this takes 8–10 minutes, no shortcuts. My grandmother swore by this, and she was right: skipping this step makes the wine taste harsh instead of integrated.
- DEGLAZE WITH WINE NOW: As soon as you remove the beef, pour in the red wine immediately while the pan is still hot. Let it bubble for 2–3 minutes to cook off the alcohol—this is where the sauce’s depth comes from. I was skeptical until I tried it: the flavor jumps from "meaty" to "restaurant-quality."
- SKIP THE CROWDED PAN: If your pan looks like a science experiment after browning the beef, spread it out and cook it in batches. I used to overload mine, and the meat would steam instead of sear—resulting in a sauce that tasted bland and watery. Trust me, 5 extra minutes now saves 20 minutes of fixing later.
Storing and reheating this dish
Fridge Storage Essentials
Transfer your completed meat sauce to airtight glass containers (I love Le Parfait or Pyrex) once cooled to room temperature. Store in the fridge at 40°F or below for up to 5 days—the flavors actually deepen overnight as the ingredients meld.
Always press plastic wrap directly onto the sauce surface before sealing to prevent a skin from forming. 💫
Freezer Prep for Long-Term
For 3-month freezer storage, cool the sauce completely before portioning into freezer-safe silicone molds or heavy-duty freezer bags. Leave 1-inch headspace for expansion and label with the date.
Thaw overnight in the fridge—never at room temperature—to preserve texture. The sauce may thicken slightly after freezing; add 1-2 tablespoons water or pasta water when reheating.
Reheating Without Ruining
Stovetop reheating is my top method: Warm sauce in a heavy-bottomed pot over medium-low heat for 10-15 minutes, stirring occasionally. Add 1-2 tablespoons red wine or beef broth if it thickens too much.
For microwave reheating, transfer to a microwave-safe bowl, cover loosely, and heat in 30-second intervals on 50% power, stirring between each. Always bring to 165°F for food safety.
Pasta Prep Ahead
Cook pasta al dente (1 minute less than package instructions) and store in airtight containers with a light coating of olive oil to prevent sticking. Reheat pasta separately in boiling water for 30 seconds, then toss with warmed sauce.
Pro tip: Add 1 tablespoon reserved pasta water when combining to restore that perfect cling. 🍝
Sauce Refresh Tricks
If your reheated sauce tastes flat, revive it with 1 teaspoon fresh basil, a pinch of red pepper flakes, or a splash of balsamic vinegar. For extra richness, stir in 1 tablespoon cold butter at the end.
The key is balancing acidity and fat—just like Flay's original technique. Never reheat with metal utensils to avoid scraping up bits that can make the sauce grainy.
Portion Control
Divide sauce into single-serving portions before freezing for easy grab-and-go meals. Store with 2 tablespoons pasta in each container for a complete frozen meal. When ready to eat, microwave the container (with lid slightly ajar) for 2 minutes, then stir and add fresh herbs.
This keeps your sauce tasting fresh, even after months in storage. ✨
Nutrition facts
Frequently asked questions
Can I substitute ground beef with another protein?
While ground beef (80/20 blend) is ideal for Flay's signature richness, you can use Italian sausage (remove casing) for a spicier twist or ground pork for a lighter texture. For a vegetarian option, try lentils or mushrooms—just increase the tomato paste to 3 tablespoons for depth. The key is browning the protein well to build flavor.
Why does my sauce taste thin or watery?
This usually happens from two things: not enough simmering time or adding too much liquid. Flay's method requires at least 45 minutes of simmering uncovered to reduce properly. If your sauce is thin, simmer uncovered for an extra 10-15 minutes or stir in 1 tablespoon tomato paste to thicken. Never rush this step—patience is what creates that velvety texture.
Can I make this sauce in a slow cooker?
Yes! Brown the meat and onions on the stovetop first, then transfer everything to a slow cooker. Cook on low for 6-8 hours or high for 3-4 hours, stirring occasionally. The long cook time actually enhances the flavors, but you may need to add 1 tablespoon tomato paste at the end to thicken it up. The wine will cook off more slowly, so taste and adjust seasoning before serving.
What's the best pasta to pair with this sauce?
Flay's version works beautifully with fettuccine or pappardelle for maximum sauce cling, but rigatoni or penne also hold up well. For a lighter option, try spaghetti—just toss with extra pasta water to help the sauce coat. Avoid delicate pastas like angel hair, as they can get overwhelmed by the rich sauce. The wider the noodle, the more surface area for that perfect sauce-to-pasta ratio.
How do I fix burnt garlic or onions?
If your garlic turns bitter, remove it immediately and start fresh with a new batch. For slightly browned (but not burnt) onions, simply continue cooking—they'll contribute sweetness. The key is watching closely: onions should be golden brown (10-12 minutes), while garlic only needs 30 seconds to perfume the sauce. Never walk away from the stove during these critical steps!